Annotate lets you create secure Workspaces, project areas where you can upload documents and share them with a defined group of people. The workspace admin user can assign roles to different users - for example some could be allowed to upload their own documents to the project, and others could just add annotations.
Workspaces Home page
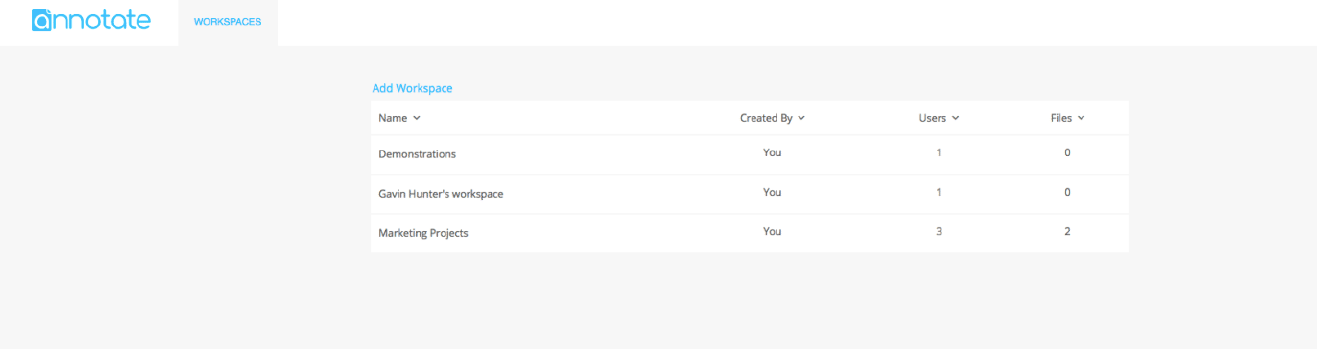
On your home page when logged in, you'll see a list of all the workspaces you've created. Click on the name of a workspace to view the documents inside.
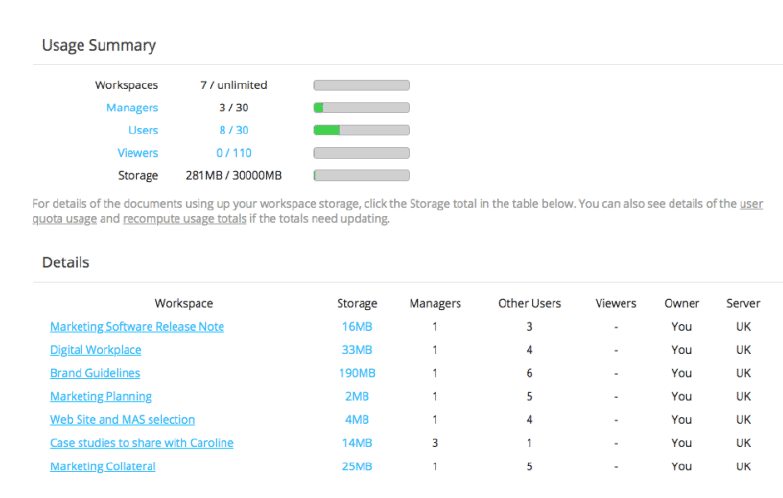
The 'Usage' link located in the menu under your avatar will show more details of the amount of storage and users each workspace has; there are options on the Account page to upgrade your subscription if needed:
On clicking a particular workspace from that page will take you directly into your chosen workspace:
Listing and Creating New Workspaces
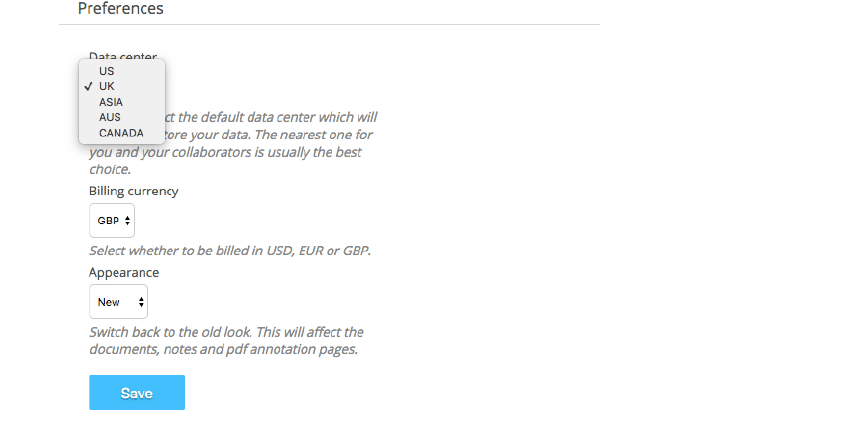
The screenshot below shows the settings page where you can select a region - most annotate users will store their workspaces in a nearby data center. The default region is auto-detected, but you can also select any particular data center.
Fles and Folders
Within a workspace, you can upload new documents, and move documents into folders for easier management. The key controls are the 'Add Folder' on the documents page; the right-click menu on an individual document, which includes options for 'Move to...' which shows the dialog below:
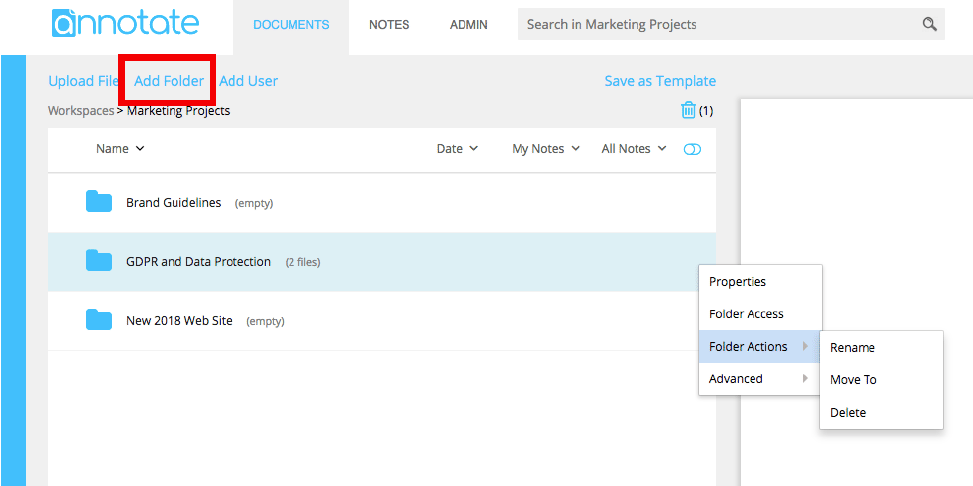
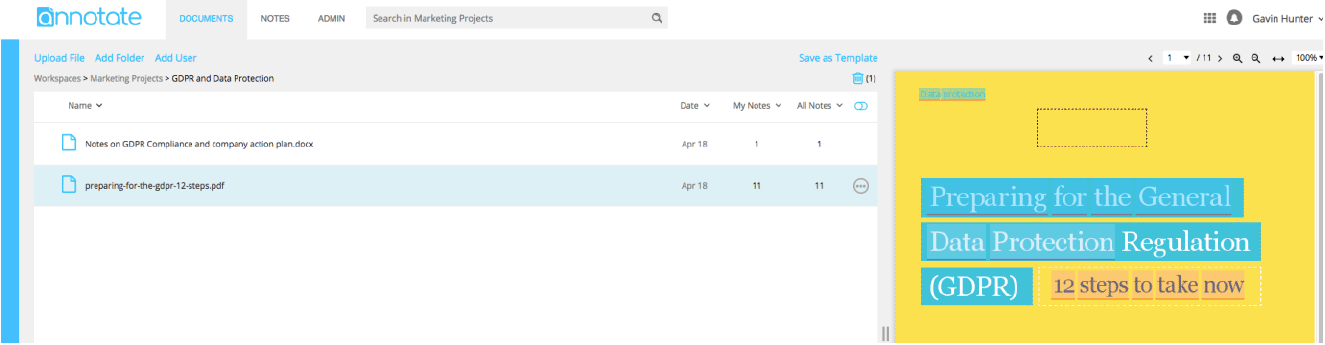
To upload a new document to a workspace, use the 'Upload File' on the top left of the documents page; this shows a dialog which lets you select the files to upload. It is also 'Drag and Drop' files or folders.

The Notes Index
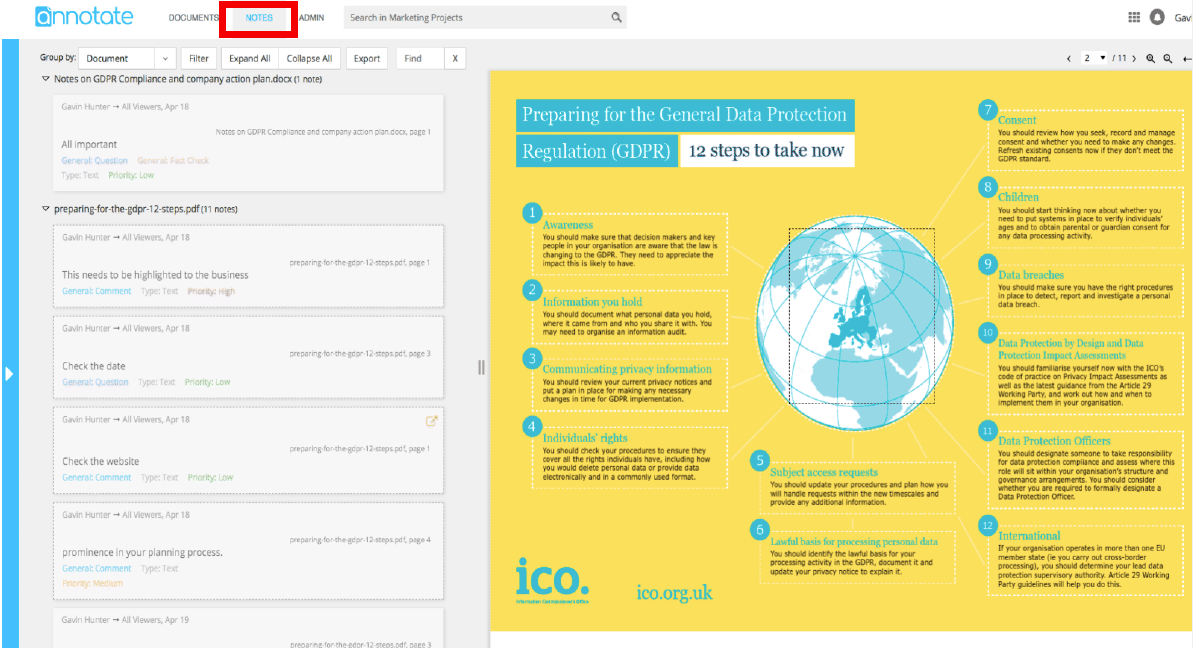
The 'Notes' tab on the workspaces page shows the index of all annotations on all documents. Clicking on a note shows the page of the document it was attached to; clicking the page preview opens up the document.
The Search Box
The search box lets you do free text searches across all the documents in the workspace. Clicking on a search result shows the page in the preview window.
The Workspace Admin Tab
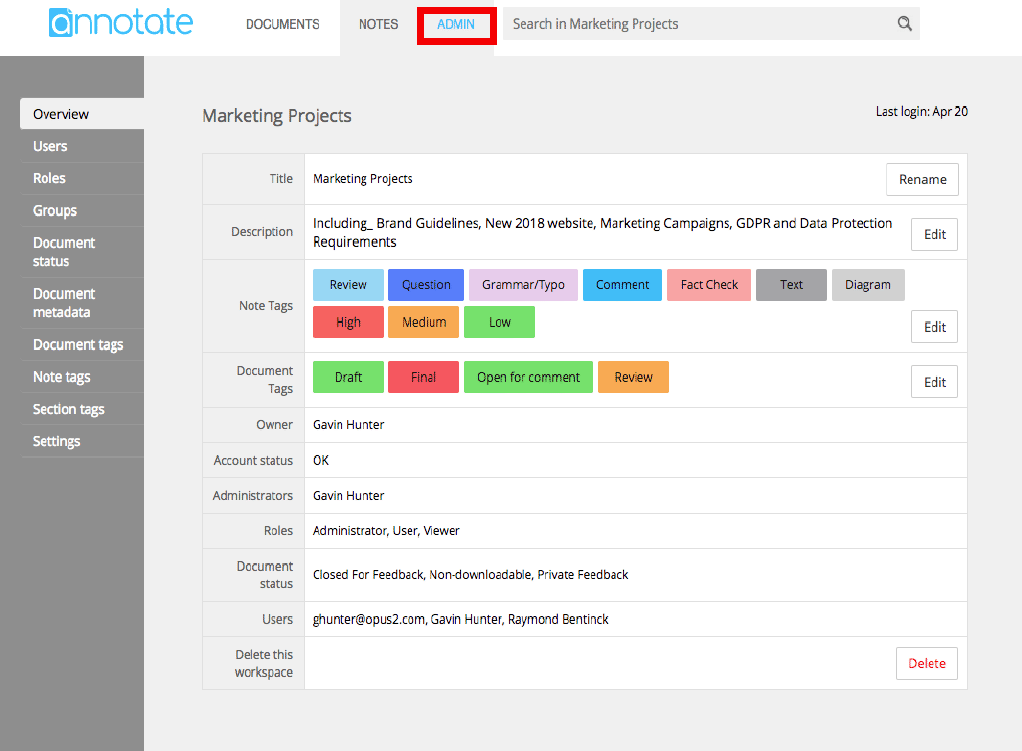
The 'Admin' tab on the workspace is visible to you if you created the workspace - and if you add any users with an 'admin' role they will also be able to see it. It includes options for changing the workspace name, adding users and setting their roles, and also setting up custom document types and groups (for advanced users with a business subscription).