1. Download the Annotate plugin from here.

Note: If the Download button is not visible, you can download it from here instead.
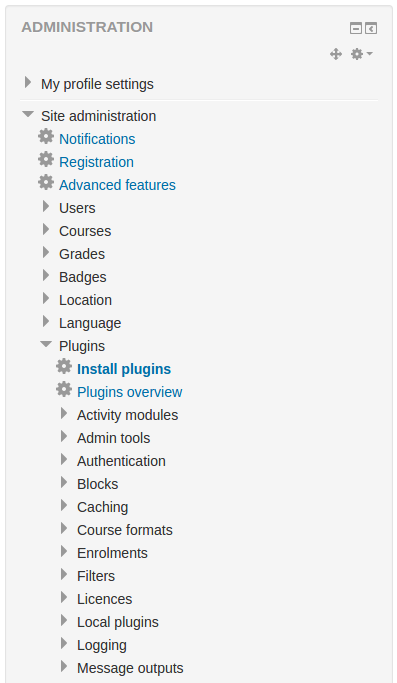
2. In your Moodle dashboard, go to Administration > Site administration > Advanced features > Plugins > Install plugins.
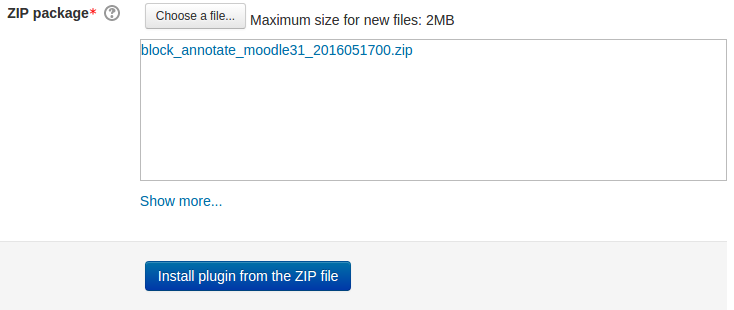
3. Select the plugin ZIP file and click Install plugin from the ZIP file.
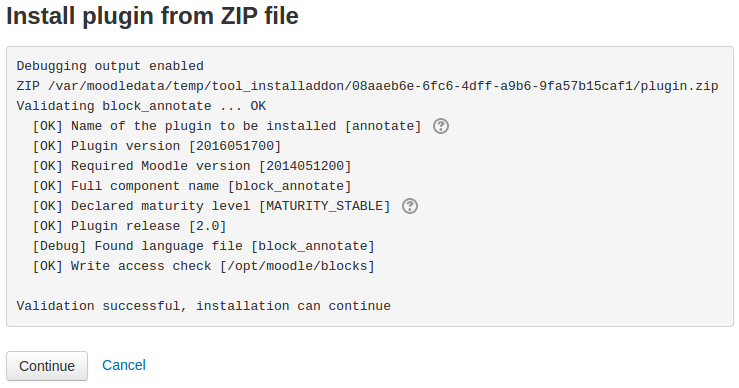
4. After the validation is finished, click Continue.
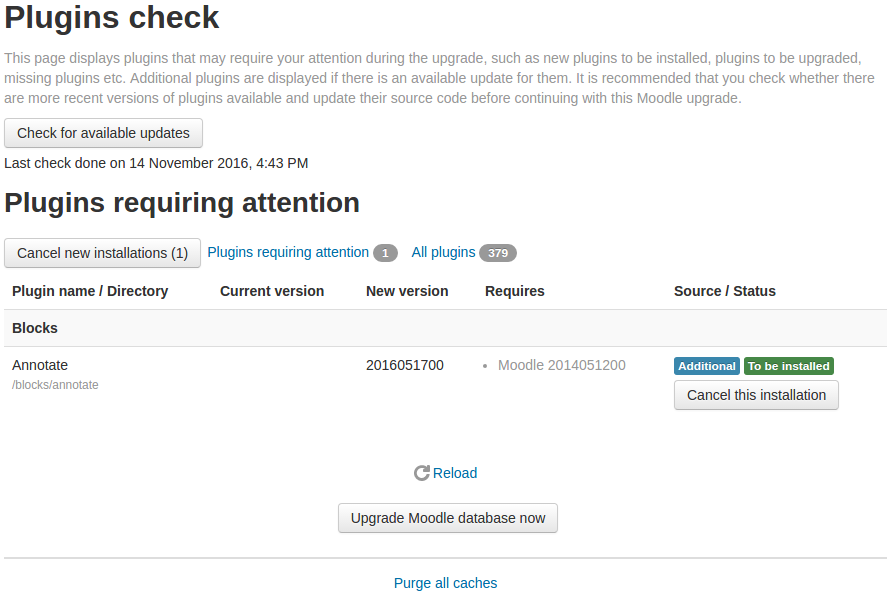
5. In the "Plugins check" page, click Upgrade Moodle database now.
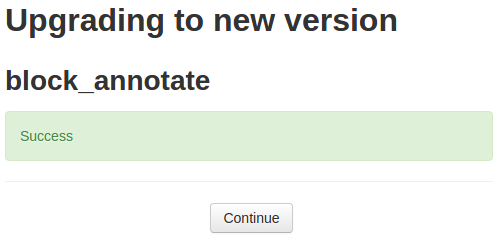
6. The plugin is installed now, click Continue.
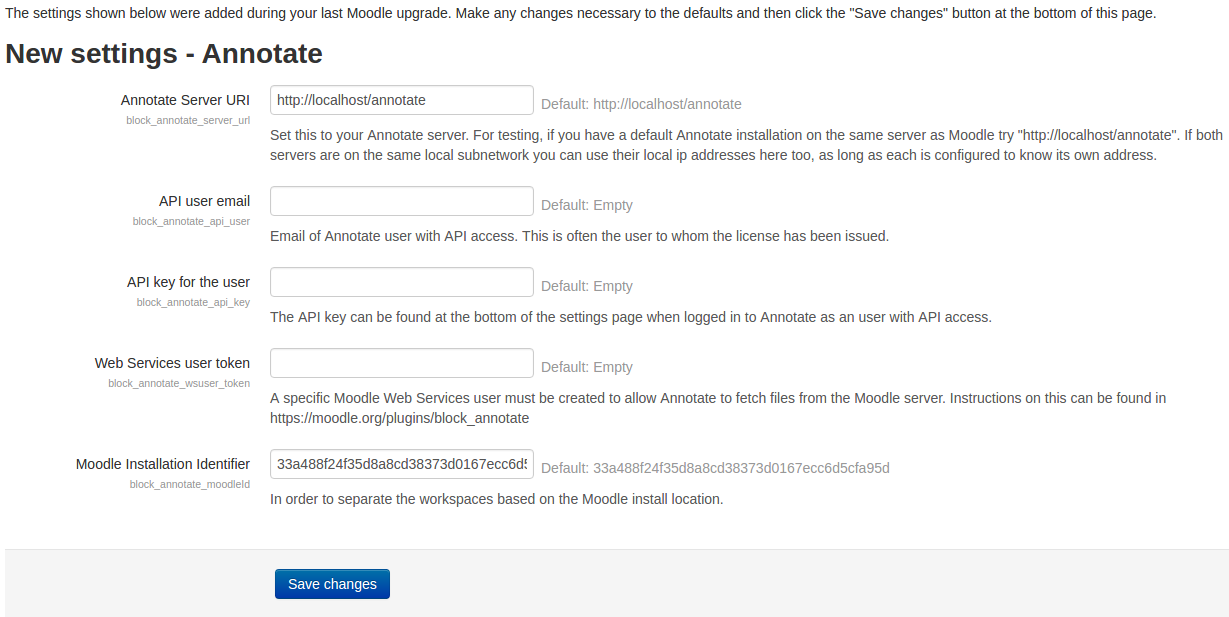
7. The next page shows the plugin configuration parameters. To be able to enter the Web Services user token you will need to follow the next part of the guide. You can visit the plugin configuration page at any time by going to Administration > Site administration > Advanced features > Plugins > Blocks > Annotate.
Part II: Generating the Web Services user token
Important: please follow the next steps closely as failing to do so will result in the documents not being accessible in Annotate.
1. Enable web services.
Go to Site Administration > Advanced features.
Click Enable web services and then the Save changes button located at the end of the page.

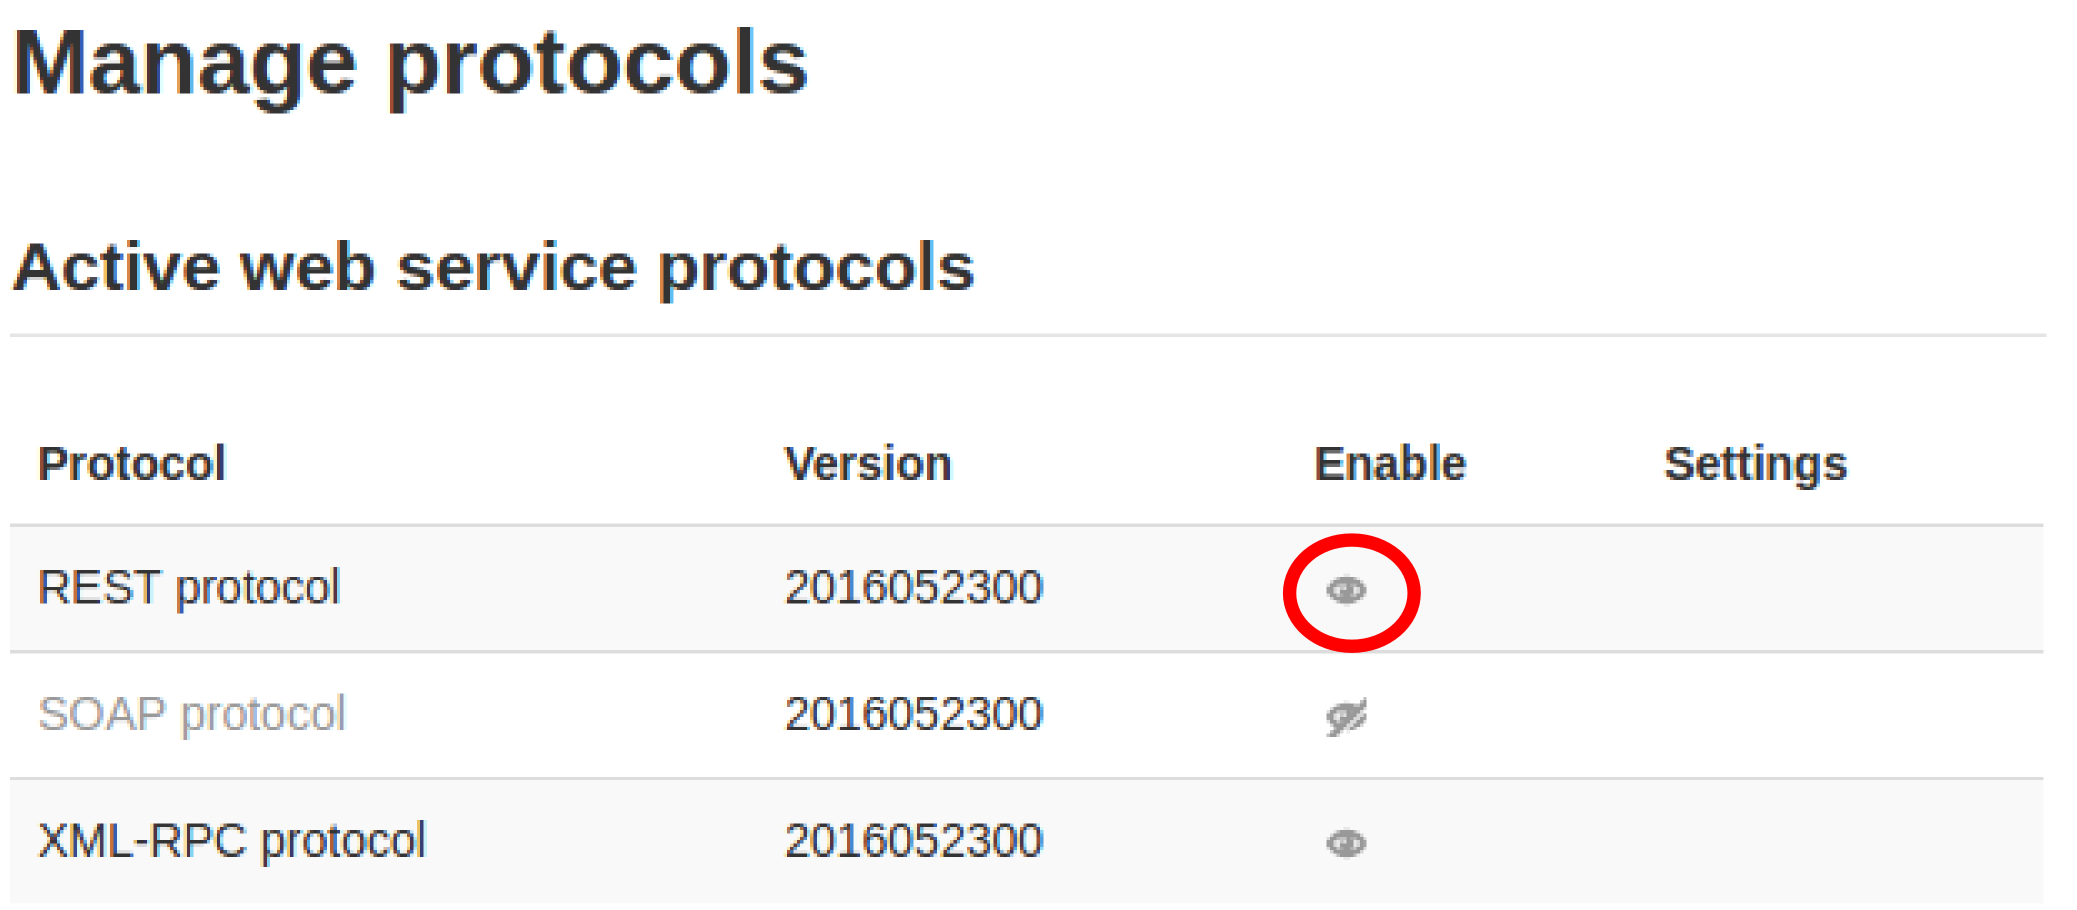
2. Enable REST protocol.
Go to Site Administration > Plugins > Web services > Manage protocols.
Enable REST protocol.
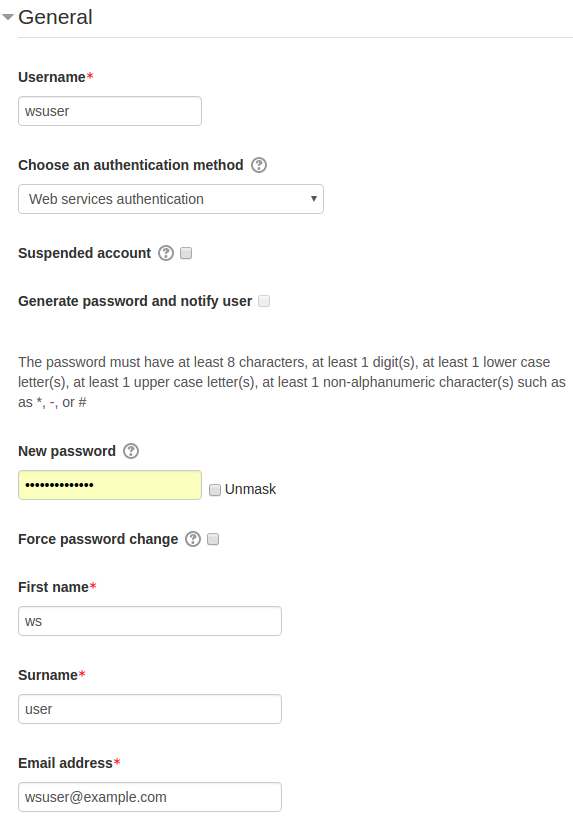
3. Create a specific user for the web services.
Go to Site Administration > Users > Accounts > Add a new user.
Username: wsuser
Authentication method: Web services authentication
Any value on the required fields First name, Surname and Email address.
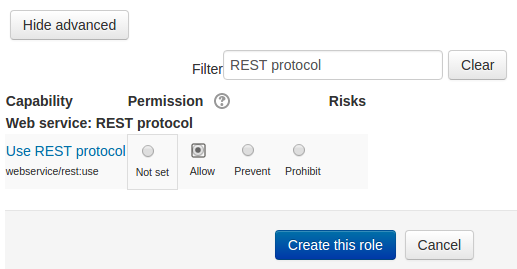
4. Create a role to be assigned to the newly created user.
Go to Site Administration > Users > Permissions > Define roles.
Click Add a new role, select Use role or archtype: Manager from the dropdown and continue.
In the next page, enter:
Short name: wsrole
Custom full name: Web services role
Use search box to find REST protocol and allow capability Web service: REST protocol.
5. Assign new role.
Go to Site Administration > Users > Permissions > Assign system roles.
Choose Web services role and assign wsuser to it.

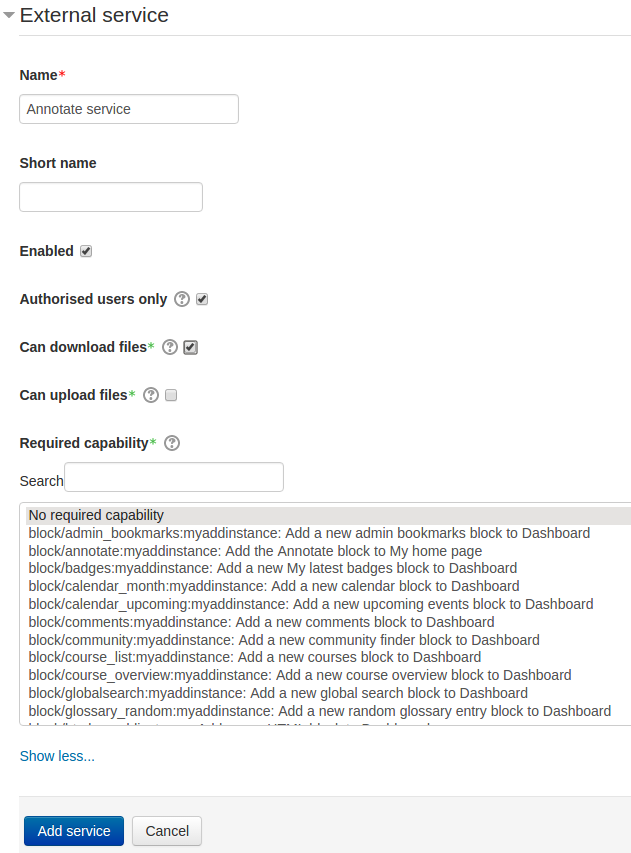
6. Create a service.
Go to Site Administration > Plugins > Web services > External services.
Click Add and enter:
Name: Annotate service
Click Enabled and Authorised users only.
Click Show more... and check the “Can download files” option.
Click Add service.
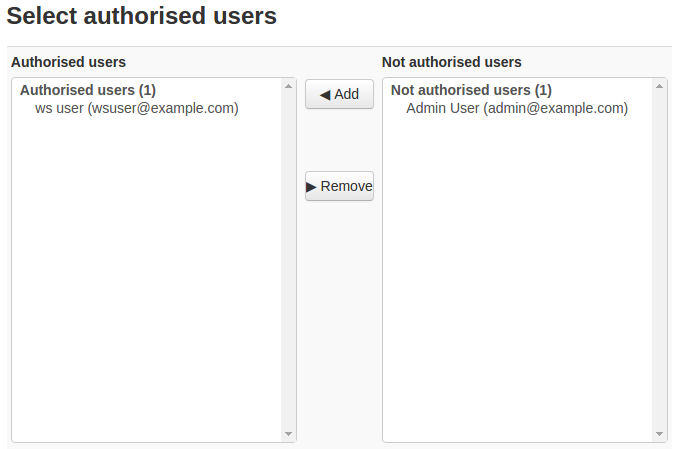
Go back to Site Administration > Plugins > Web services > External services, click Authorised users in the Annotate service and add wsuser to the authorised users list.
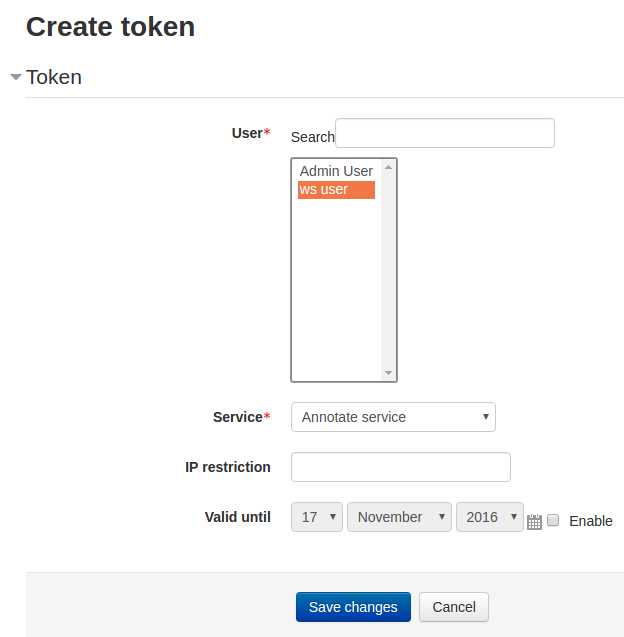
7. Create the user token.
Go to Site Administration Plugins > Web services > Manage tokens.
Click Add and select:
User: wsuser.
Service: Annotate service
8. Enter the user token in the Annotate server settings page.
Go to Site Administration > Plugins > Blocks > Annotate.
Part III: Adding the Annotate block to the course
1. Turn editing on in the course page

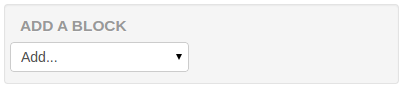
2. In the lower left corner of the page, select the Add a block drop-down menu and choose Annotate.
3. Now a button has been added next to each document in the course. Clicking this button will allow you to annotate it.

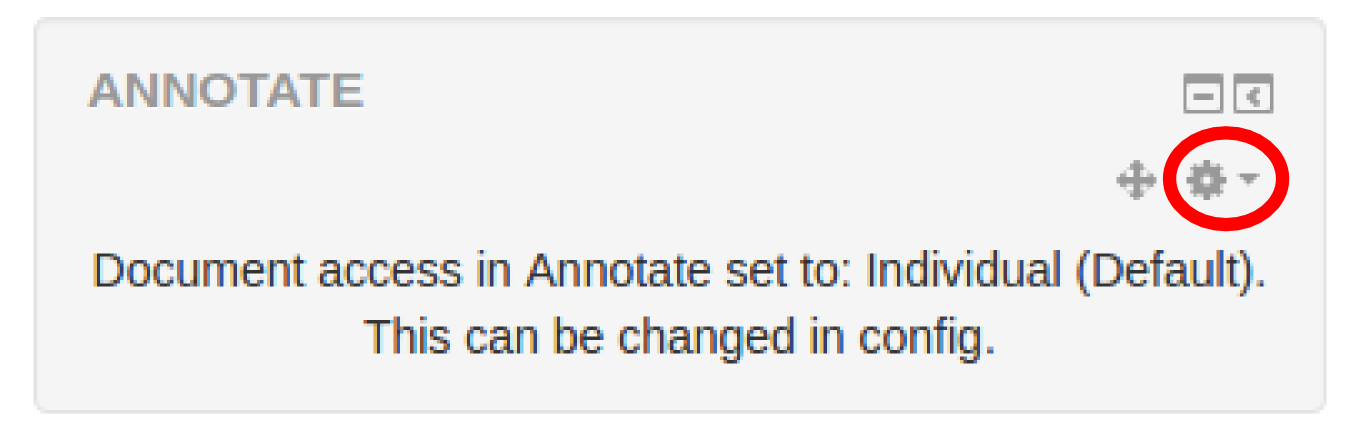
4. The Annotate box is also now visible in the course page, where the type of document access is specified - individual or group access to the documents in Annotate.
To change this, just visit the block configuration page.